
Module 2: Grow
Now that you’ve had a chance to explore the environment around you, let’s dig a bit deeper to find out what conditions plants need to thrive. Then, you can harness your new plant knowledge, sow the seeds of your first microgreens trial and build your own mini hydroponic grow house!
How do plants grow?
What did you discover about the things that plants need to grow when you tested your sensors? Were there any saggy stems or funky-looking fronds?
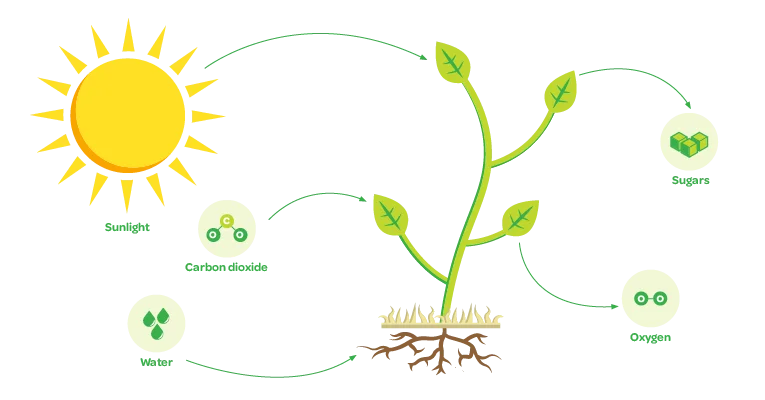
Plants need three basic things to grow:
When they have too much, or not enough of these things, they can turn funny colours, won’t grow as tall, might start looking slouchy and can shrivel up!
Plants use a special process called photosynthesis to convert light from the sun, carbon dioxide from the air and water into a special sugar (glucose) and oxygen, that helps the plant grow.

Your microgreens will also go through photosynthesis to grow. Check out the ‘from seed to harvest’ poster in your kit to see what they’ll look like at each stage of growth.
Hydroponics
But what about soil? Are you surprised to see that soil is not always necessary for plants to grow?
Yes, it really is possible to grow plants without any soil at all! Hydroponics is a way of growing plants without soil that uses just light, air and water to provide everything that a plant needs to thrive.
Using hydroponics to grow plants is super sustainable because you need 90% less water than regular farming, it minimises the use of harsh chemicals that farmers need to fertilise soil, it requires a whole lot less land and can actually produce vegetables in a shorter time!
To grow your microgreens sustainably, you’re going to harness the power of hydroponics.
Ready to grow?
Magnificent microgreens
Let’s grow some microgreens. In the Plant Challenge you’re going to grow two trials of microgreens.
Before we start, let’s find out a bit more about what they are and what makes them so special.
Microgreens are the early shoots of vegetable and herb plants. They have a strong, aromatic flavour and contain loads of concentrated nutrients. Microgreens are picked at a certain point in time when they are nutritious and delicious. With the right conditions, they are ready to be picked and eaten as early as 7–14 days after planting the seeds.
Did you know some microgreens have up to 100x the nutrients of full-grown plants!
Signs of a good microgreen crop
You’re going to compare your two microgreen trials against each other to see which grew a better crop. But first, you need to know the parameters of a successful batch of microgreens.
The signs of a successful microgreen crop are:
- 3–7cm in height
- Even growth pattern
- Sprout quickly. This should be within 3–5 days depending on the seed you choose
- Vibrant in colour
- Growing straight upwards and not falling over
Step one: plant your first trial
Get into your rōpū, it’s time to sow the seeds of your very first microgreen trial.
Let’s check in again with Soltice who you met earlier in the challenge. In this next video she’s going to share the secret to growing bountiful hydroponic microgreen crops followed by some tips for planting your first trial.

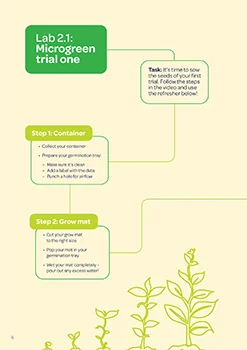
Lab 2.1: Microgreen trial one
Let’s sow the seeds of our first batch of microgreens! Follow the tips from the video and the instructions in your lab book. Remember to name and label your grow trays.

Step two: monitor your microgreens
To make sure your microgreens thrive, you need to monitor their growth and growing conditions every school day and collect data.
The data you collect will be split into two categories – qualitative and quantitative.
Qualitative data is information you observe by using your five senses.
You’ll look out for things like the colour of your leaves, how many leaves have sprouted, what your microgreens smell like, or how evenly they’re growing.
Quantitative data is information in the form of numbers, or quantities.
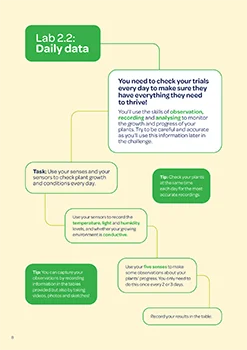
You’ll get your quantitative data by using your sensors to measure the temperature, light, and humidity levels of your microgreens, and whether they are conductive. It’s best to try and do this at the same time every day.
When you measure these conditions, record the results in your lab book right away. You’ll use this information later in the challenge, so make sure you record your results accurately.
Lab 2.2: Daily data
Measure the conditions and the growth of your plants carefully using your sensors, as well as your five senses. Make sure you check on your microgreens every school day!

Reminder!
Get prepped for next module by bringing in recyclable materials for your grow house and some ingredients to make compost tea. These could be things like banana skins, green tea, epsom salt, baking soda or any other fruit and vege scraps you may have left in your lunchbox. Be careful with what you choose – some scraps may harm your greens, so it pays to do your research.
Checklist
Nice work team! Today you:
- Learnt the science about how plants grow and hydroponics
- Discovered microgreens
- Sowed your first trial of microgreen seeds
- Got a plan together to check your plants on the daily!